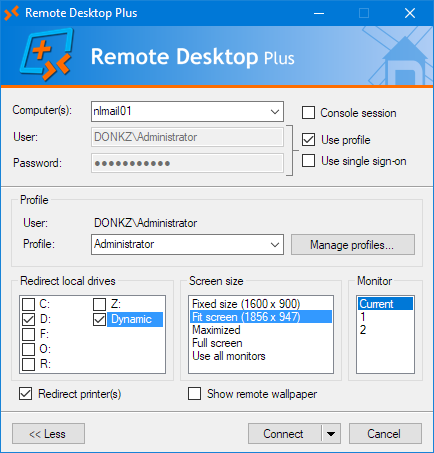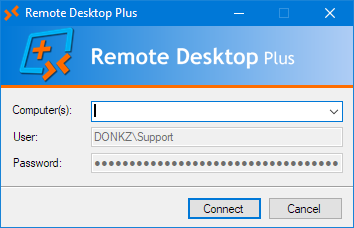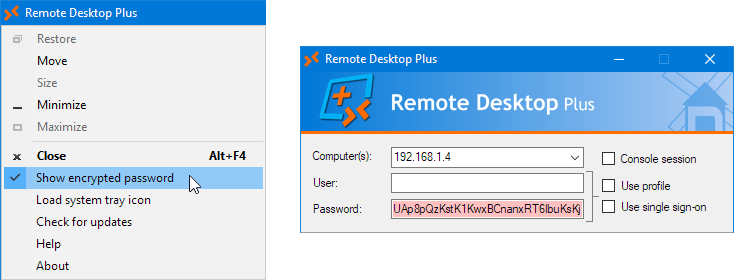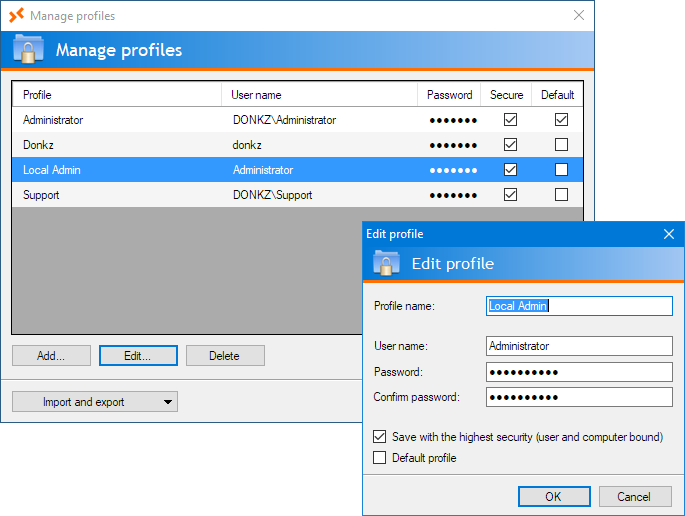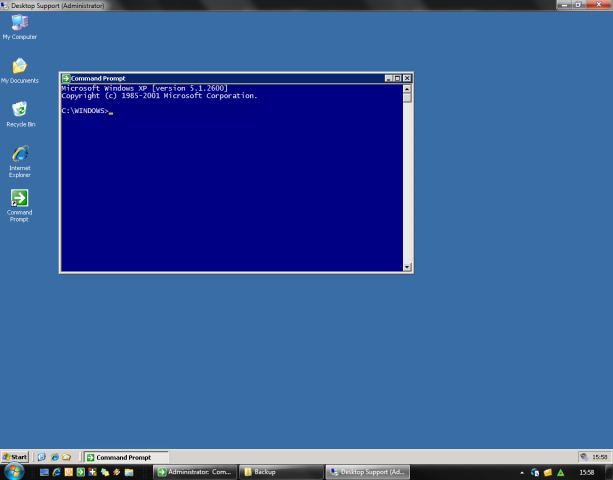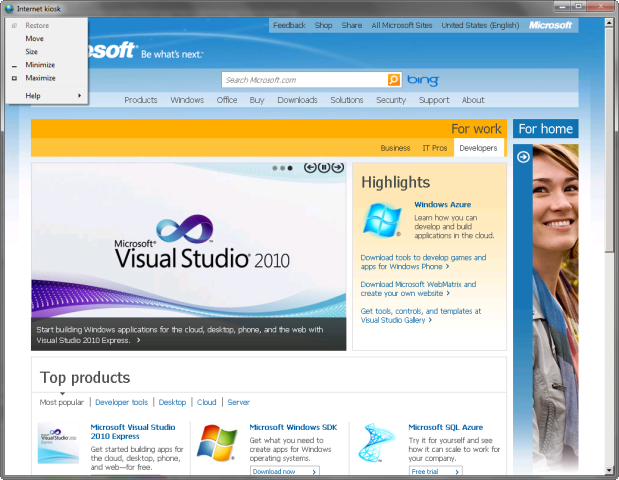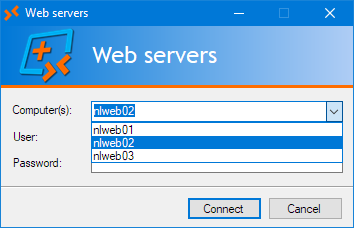
Remote Desktop Plus (RDP+) allows you to launch a Remote Desktop session using a username and password entered from the command line (autologin) or imported from a saved credential profile. It also features a unique kiosk mode, which, together with all the other available command line parameters, enables you to easily provide access to Remote Desktop sessions to third parties or end users.
But that’s not all…
Features
Screenshots
Command line parameters
Remote Desktop Plus supports the following command line parameters:
Examples
rdp /v:nlmail01 /u:administrator /p:P@ssw0rd! /max /mon:2
rdp /i:”Domain Admin” /fit /drives /noprinters /title:”$COMPUTERNAME$ ($USERNAME$) – Remote Desktop”
rdp “G:\RDP\Support.rdp” /v:nlfps01 /u:helpdesk@donkz.local /drives:fixed,-c:,p: /log:$PROGRAMDIR$\Logs\rdp\$YEAR$$MONTH$$DAY$.log
rdp /v:nlts03 /remoteapp:”||FileZilla” /u:donkzftp /p:Tr@ns1t
rdp /i:”Backup User” /w:1024 /h:768 /domain:donkz /kiosk
/allowed:”10.10.*.*,nlfps*.donkz.local,(nl(app|db)d{2}(%USERDNSDOMAIN%)?)”
rdp /v:nlapp01 /i:”Control Center” /noclose /o:”redirectcomports:i:1, redirectsmartcards:i:1″
rdp /v:nlts01,nlts02,nlts03,nlts04 /lb /remoteapp:”||e-Help Client 3.0″ /u:donkz\helpdesk /pe:dixYA/m8pOHVVkQLAI9ifQ==
rdp /v:nldmz01 /u:donkz\dmz /p:P@ssw0rd! /start:”mstsc \\nlfps01\config$\RDPDMZ.rdp /f”
/title:”Standby Support” /icon:”%WINDIR%\System32\shell32.dll,43″
rdp /v:nldc05,nldc06 /i /console /fit:35 /pos:center
rdp /v:nlapp02 /u:donkz\internetkiosk /pe:356zm6vRajBcS3mnnudOOh43bZKSWewQ /noprinters /nodrives
/start:”C:\Program Files (x86)\Microsoft\Edge\Application\msedge.exe -k https://www.microsoft.com”
rdp /v:nlapp03 /u:donkz\helpdesk
/start:”\”C:\Program Files\Support\rc.exe\”” \”\\nl-fps-01\Config$\RC\\%COMPUTERNAME\%\%USERNAME%.cfg\””
rdp /v:nlfps02 @options.rdpc /kiosk:cup /gui /log /tray
rdp /u:%USERDOMAIN%\%USERNAME% /kiosk:cp /gui /fit:95% /eventlog
rdp /kiosk:cp /listallowed:nlapp01,nlapp02,nlapp03 /noclose /ontop /u:Student1
rdp /fav:”Batch server” /-pos /fit /title:”$FAVORITE$”
rdp /fo /v:nlapp01,nlapp02 /i
rdp /kiosk /sso /allowed:nlrds* /programtitle:”Remote Support for %USERDOMAIN%” /programicon:”D:\Icons\Remote.ico”
/title:”$PROGRAMTITLE – $COMPUTERNAME$”
Notes
Profiles
Normally profiles are saved with the highest level of security, which means they can only be used using the account which created them and only on the computer they were created on. You can also save profiles using a less strict security, which means they’ll be available on any other computer and will ‘roam’ with you. Please note however that because no external password key is used, a determined individual with the right tools (debuggers, disassemblers), the right knowledge of programming, access to the registry or computer of the user, and some other ingredients, could potentially break the encryption, so use this option with care.
Also available is the add-on tool RDPProfile.exe, which allows you to automatically create profiles from the command line. You could use this from a login script to pre-populate some profiles for end users.
Startup program
If you need to use double quotes in the /start startup program, you have to put a backslash (\) in front of each quote. You can also use environment variables in your command, both local and from the remote computer. To use remote environment variables, you must precede the percent signs with a backslash.
Combined example: rdp /v:nlapp03 /u:donkzdomainhelpdesk /start:””C:\Program Files\Remote Control\rc.exe” “\\nlfps01\Config$\RC%COMPUTERNAME%-%USERNAME%.cfg””
If Remote Desktop Plus is started by user JohnDoe, the last part of the command will be expanded to “\\nlfps01\Config$\RCNLAPP03-JohnDoe.cfg”.
Title
You can set a user defined text as your title bar by using the option /title. You can use local environment variables in your title plus these two special variables:
%s: Will be expanded to the server name you’ve connected to.
%u: Will be expanded to the username used to login to the remote computer.
Example: rdp /i:”Domain Admin” /fit /title:”%s (%u) – Remote Desktop”
When connecting to the server nlfps01, this would result in the title bar text nlfps01 (DONKZ\Administrator) – Remote Desktop.
As of version 7.0, you can also use /programtitle. This will set the title for the RDP+ program itself. When running in kiosk mode, this will also change the text in de logo banner.
Icon
You can also use your own icon for the session by using the option /icon. This can be either a normal icon file (G:IconsRemote.ico) or an executable or .dll file (%ProgramFiles(x68)%\Microsoft\Edge\Application\msedge.exe). For files containing multiple icons, you can specify the desired icon using its index (%WINDIR%\System32\shell32.dll,43).
Please note that using /icon will also force an implied /wait, due to the way Windows retains (or does not retain) dynamically changed icons when the program which requested the changes is closed.
Starting with version 7.0, you can also use /programicon to change the icon of RDP+ itself.
RemoteApps
You can start a RemoteApp with Remote Desktop Plus, either from the command line or specified in the .rdp file. You can enter the RemoteApp using either its name (“||FileZilla”) or the full path to the executable (C:\Windows\System32\Notepad.exe).
When using the name, always enclose it between double quotes, otherwise your system may confuse the double pipe signs with the double pipes used in batch scripting.
All options concerning the screen (like /fit and /mon) are ignored when using RemoteApps. The same goes for /title and /icon.
Due to the way the Remote Desktop client launches all RemoteApps in a general, embedded instance of mstsc.exe, the option /wait is also not supported.
Remote Desktop Gateway
Remote Desktop Plus can login to remote servers through a Remote Desktop Gateway. You can use the option /rdgateway to specify the Remote Desktop Gateway server to use. There are no other command line switches, so these must be configured from the normal Remote Desktop client and saved in a .rdp file, or entered through the /o option.
When you select the option Use my RD Gateway credentials for the remote computer, RDP+ will also automatically login to the RD Gateway. If not, you will be prompted for credentials.
Single sign-on
Starting with version 7.0, Remote Desktop Plus supports logging in to remote computers using the single sign-on (SSO) provided by Windows’ CredSSP. To use SSO some requirements have to be met, both on the client computer and the target.
- The client computer must be joined to a domain.
- The logged in user must be a domain user.
- The client computer must have Remote Desktop Connection 7.0 or higher installed.
- The target computer must also be domain joined and should be running Windows 2008 or higher.
- On the target computer, the security layer of the RDP-Tcp connection must be set to either Negotiate or SSL (TLS 1.0).
- On the client computer, credential delegation must be configured trough a group policy.
Location in the Group Policy Editor: Computer Configuration\Administrative Templates\System\Credentials Delegation
Option to modify: Allow Delegating Default CredentialsAdd the target computer(s) using the prefix TERMSRV/ with optional wildcards. For example: TERMSRV/nlapp01, TERMSRV/*.donkz.local or even TERMSRV/*.
RDP+ will check for the first three requirements. If they are not met, the GUI will not show the option for single sign-on.
To use SSO from the command line, you can use the switch /sso.
Kiosk mode
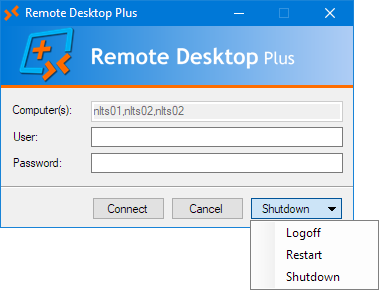
With the kiosk mode, you can set the GUI to a special restricted mode, in which only the fields for the target computer, username and password are shown. Using a 3-character ‘mask’, you can enable or disable any of the three fields. Each character in the mask stands for one of the three fields (computername, username, password). A 1 will enable the field, a 0 will disable it.
As of version 6.2, you can also use the first letters of the field(s) you’d like to enable as the mask: c(omputer), u(ser) and/or p(assword).
For example, /kiosk:011 or /kiosk:up will disable the computername field and only allow the user to enter the username and password.
The kiosk mode will default to 100 (or c) when a mask has not been specified.
Allowed targets list
Using the /allowed command line option, you can restrict users to only a selected range of computers. If the user tries to connect to a computer which is not in the allowed target list, the connection will be denied. This can be especially useful for publishing RDP+ to ‘untrusted’ users.
You can use both wildcards and regular expressions in the list. RDP+ will also try to translate hostnames to IP addresses and vice versa for its matching. So for example, when using /kiosk:100 /allowed:127.0.0.*, a target computer of localhost will be considered valid.
Enclose targets in parentheses to use regular expressions. Environment variables are also supported.
Example: rdp /allowed:”10.10.*.*,nlfps*.donkz.local,(nl(app|db)\d{2}(%USERDNSDOMAIN%)?)”
Note: When using the pipe sign (|) in a regular expression, be sure to enclose the entire string in double quotes to prevent conflicts with batch scripting.
You can also use the /listallowed command. This will transform the editable computer textbox in the GUI to a listbox with only the allowed computers listed. This can be more user friendly for third parties. Please note however that wild cards and regular expressions are not supported in this mode.
Drive redirection
You can specify the drives you want to redirect to the remote computer by using the /drives option. Drives can be specified either by name or by drive type (Fixed, Removable, Network, CD-ROM). To redirect drives that get plugged in later, you can use the drive type Dynamic.
You can also exclude certain drives by preceding them with the minus sign. For example, /drives:fixed,-c:,p: will redirect drive P: and all fixed drives except C:.
If you don’t specify any drive or type, /drives will default to all drives, including the ones plugged in later.
Extended .rdp options
By using the /o switch, you can specify every option supported by the .rdp file. Options should be given in the exact same syntax as used in .rdp files.
You can specify multiple options by separating them by commas. To use commas within options, precede them with a backslash.
Examples: rdp /start:terminal.exe /o:”shell working directory:s:H:My Documents, redirectcomports:i:1″ rdp /remoteapp:”||ProdDB” /o:”remoteapplicationcmdline:s:proddb, sqlsa, P@ssw0rd, remoteapplicationname:s:Production Database”
The native RDP+ command line switches always take precedence over the /o options. So if you use rdp /printers /o:”redirectprinters:i:0″, then /printers will win.
For an overview of (most of) the possible settings, you may find this page useful.
Log file
You can log all started sessions to a semicolon-delimited log file using the /log option. If you don’t specify the name of the log file, it will default to the file rdp.log in the directory containing rdp.exe. If you do specify a filename, the name can be further customized through both local environment variables (like %COMPUTERNAME%), and some special variables:
%s: Will be expanded to the server name you’re connecting to.
%u: Will be expanded to the username used to login to the remote computer.
%c: Will be expanded to the name of the local client computer. When starting RDP+ locally, this will be the same as %COMPUTERNAME%. When starting RDP+ from within a Terminal Server or Citrix session, %c will contain the computername of the originating client computer (i.e. %CLIENTNAME%).
%y: The 4-digit representation of the current year.
%m: The 2-digit representation of the current month.
%d: The 2-digit representation of the current day.
Example: rdp /log:%y%m%d-%s.log
When connecting to the server nlfps01 on the 30th of December, 2015, this would result in the log file 20151230-nlfps01.log being used.
The semi-colon delimited log file contains all kinds of information about the computer and user which started the session, and information about the target computer and how the session was started. When RDP+ is launched from within a Remote Desktop or Citrix session, it will also log the computername and IP address of the originating client. This can also be useful when using thinclients.
Event log
Much like the /log option, the /eventlog option writes an entry in the Application event log:
Log Name: Application
Source: Remote Desktop Plus
Date: 2-04-2013 23:21:09
Event ID: 12701
Task Category: None
Level: Information
Keywords: Classic
User: N/A
Computer: DTP0348
Description: Remote Desktop session started…
Date and time: 2013-04-02 23:21:07
Computer: DTP0348
IP address: 10.0.1.198
Windows version: Microsoft Windows 7 Ultimate
Local username: DONKZ\PeteL
TS client name: –
TS client IP address: –
Remote computer: nlapp03
Remote port: 3389
Remote user: DONKZ\Administrator
Remote Desktop Plus version: 5.0
Remote Desktop Connection version: 7.1
Password mode: Profile
Session type: Normal
Application: –
System tray icon
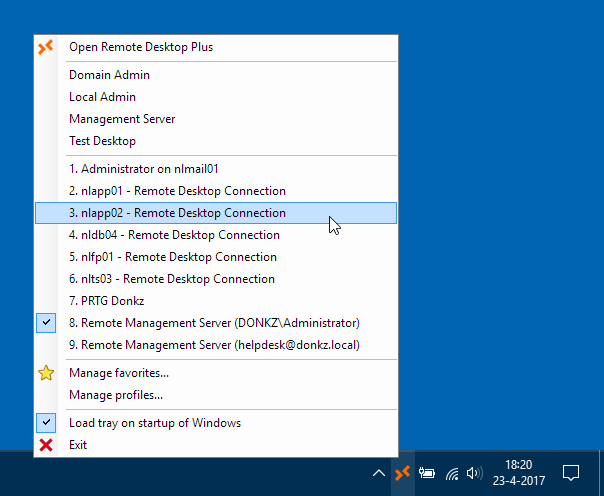
RDP+ features an optional system tray icon. This icon can be used for the following things:
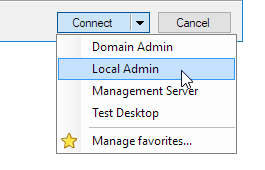
- Managing and launching favorites.
- Starting a new ‘blank’ instance of RDP+.
- Quickly switching to currently active Remote Desktop sessions.
- Automatically load the tray when you start your computer.
- See which Remote Desktop session you had active last, or by doubleclicking the tray icon, immediately switch to the last active session.
When using the kiosk mode, the system tray reverts to a simpler mode, in which only the active sessions are available.
Favorites
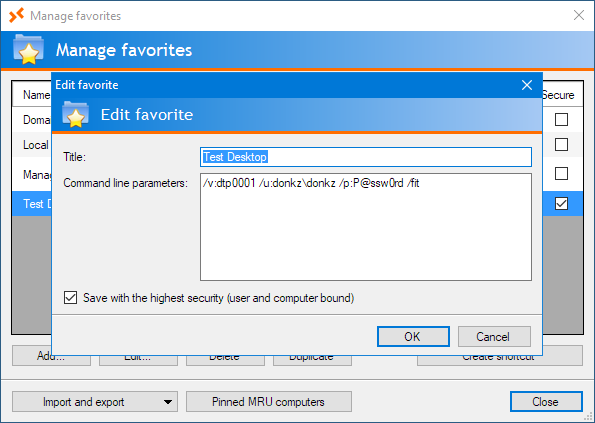
When creating favorites, you have the option to save them with the option Save secured (user and computer bound). This means the favorite is only available on the computer it was created on. Use this option when you have specified sensitive passwords in the command line.
When not saving it as a secure favorite, the favorite will be available on any computer you logon to when using roaming profiles. It will be saved using the same encryption /pe or Gencrypt uses, so it is still secure from prying eyes.
Command file
If you regularly use the same command line parameters, you can also put them in a separate file and specify this file with the @-parameter. RDP+ will then use the contents as its command line parameters. You can also put normal .rdp file style options in the command file, without having to precede them with /o. This way you can use the command file as a master .rdp file.
Comments can be added by starting the comment line with a semi-colon.
Example of a command file:
; Command line
/fit /noprinters /drives:fixed /icon:Company.ico /title:”%u on %s – Remote Desktop”; Default .rdp file options
enablesuperpan:i:1
keyboardhook:i:2
Tip: Use .rdpc as the suffix for the file and run RDP+ with the command line /register once to register the .rdpc extension to RDP+. This allows you to double click command files to immediately launch RDP+ and have the command files shown in the recent files when pinning RDP+ to the Start Menu.
URI/hyperlink support
Starting with RDP+ 7.0 you can also use URI to start Remote Desktop sessions with support for every command line option RDP+ supports. This enables you to start sessions using hyperlinks on webpages or from password managers like KeePass.
To be able to use URIs, you’ll have to start rdp.exe once with the command line switch /register. This will import the URI scheme. (When using the MSI installer for RDP+, this step is not necessary.)
The syntax is pretty straighforward: rdp://computer[:port]/[?]parameter1=value¶meter2=value
In which the parameters are any of the supported RDP+ command line parameters.
RDP+ normally only has two command line parameters without a /-prefix : The connection file and the @-switch for the commandfile. When launching through a URI you can specify those parameters using file= and commandfile= respectively.
Example of a normal command line versus its URI equivalent:
Command line:
rdp Connection.rdp @Commands.rdpc /v:192.168.0.107 /mon:2 /u:DOMAIN\User /p:P@ssw0rd! /nodrives /fit:35 /o:”disable themes=i:1″ /programtitle:”Session for %USERNAME%”URI:
rdp://192.168.0.107/?file=Connection.rdp&commandfile=Commands.rdpc&mon=2&u=DOMAIN\User&p=P@ssw0rd!&nodrives&fit=35&o=”disable themes=i:1″&programtitle=”Session for %USERNAME%″
Setting default options
You can set all of the ‘slashed’ command line options as the default option for Remote Desktop Plus by setting the user environment variable RDP.
For example, you can set RDP to /fit /mon:2 /noprinters /drives:fixed.
When you set /mon to a number higher than the number of monitors attached to your computer, RDP+ will automatically fall back to monitor 1. This means you can safely set it to 2 if you always want your session to start in the second monitor when it is available.
Default options can also be set using the registry key HKEY_CURRENT_USER\Software\Remote Desktop Plus\DefaultOptions or HKEY_LOCAL_MACHINE\Software\Remote Desktop Plus\DefaultOptions.
The default options can of course be overruled from the command line. Either by entering an opposing or overruling option (/printers vs. /noprinters, or /fit vs. /max), or by using the negating /- option. For example: /-title will negate /title:”Something”.
Another option to set default options is placing a command file called Default.rdpc in your Documents folder, similar to the Default.rdp file from Remote Desktop Connection.
Group policies and registry settings
Some of the behavior of Remote Desktop Plus can be controlled through Group Policies or registry settings. More information about this can be found on this page.
Order of preference for commands
RDP+ supports many different ways for specifying commands or options. These are processed in the following order:
- Value of HKEY_LOCAL_MACHINE\Software\Remote Desktop Plus\DefaultOptions.
- Value of HKEY_CURRENT_USER\Software\Remote Desktop Plus\DefaultOptions.
- Content of the Deafult.rdpc file in your Documents folder.
- Value of the environment variable RDP.
- Content of the command file.
- Command line arguments.
- Machine part of Group Policy setting (Computer Configuration).
- User part of Group Policy settings (User Configuration).
Last setting wins.
Localization
You can localize RDP+ for your own language using a customizable XML file. In the download section you will find a Dutch template (language_nl.xml) which you can use to create your own translation. Once you’re done, save it in the directory containing rdp.exe and replace the template part in the file name with the two letter (ISO 639-1) language code for the language your computer is running.
For example: language_de.xml for German.
Note: Starting with version 7.0, the format of the XML file has changed drastically. If you previously made your own language file, you’ll have to recreate it for 7.0.
Exit codes
When starting Remote Desktop Plus from a script, you can use the option /batch to prevent RDP+ from displaying error messages. Instead you can catch potential errors through the exit codes (errorlevels) which RDP+ raises.
These are the possible exit codes which can be raised:
0: No errors.
1: General undefined error.
2: Specified connection file not found.
5: Target computer not in the list of allowed targets.
29: Cannot write to the log file.
30: Profile not found.
87: Invalid command line parameter or combination of command line parameters.
161: The format of the specified path is invalid (filename of the connection file, log file or command options file).
259: No responsive server found in the list (when using /lb).
2382: Invalid notation of the specified host name or IP address.
10060: Connection timed out to the specified server.
11001: Remote hostname not found.
Please not that exit codes are only raised when RDP+ is either started with its own /wait command line switch or when you launch RDP+ from a script using the appropiate syntax to wait for completion.
Examples of the latter:
Batch:
@ECHO OFF
START /WAIT rdp.exe blah blah
ECHO %ERRORLEVEL%
VBS:
Set objWSH = WScript.CreateObject(“WScript.Shell”)
Shell = objWSH.Run(“rdp.exe blah blah”, 1, True)
WScript.Echo Shell
PowerShell:
$Shell = Start-Process -FilePath “rdp.exe” -ArgumentList “blah blah” -Wait -Passthru
$Shell.ExitCode
System requirements
License
Remote Desktop Plus is FREE to use for home, personal or corporate use. You may use and distribute the program free of charge for both commercial and non-commercial purposes, as long as end users are not charged a fee of any kind for its use.
If you want to show your appreciation and make a difference in this world, then please consider making a donation to a reputable charity, like these for example.
Download
Current version: 7.0.1
Release date: March 13, 2018
Total number of downloads (as of the release of version 7.0.1): 43,104
The standalone executable for Remote Desktop Plus. No installation required.
Windows Installer package (MSI) for Remote Desktop Plus. This installer performs the following actions:
Update history can be found in the change log.
Check the downloads page for all available downloads.
Please feel free to leave your comments, bug reports or suggestions…
